Rope Management
 A belayer makes a rope basket at a belay stance.
When you are climbing multi-pitch routes, you will need to belay your second up to you, which means you need to figure out what to do with your rope. If you are haphazard about rope management, it will get tangled, and the time you saved by being lazy will be nothing compared to the time you will need to clean up the mess. There are a few techniques for managing your rope or ropes at the top of a climb, and they all work fairly well, but some are better for certain stances than others. Here we cover three systems for managing your rope, and when to use them.
|
At a Glance:
Keeping your rope neat at belays saves time and headaches
Flaking It Out:
|
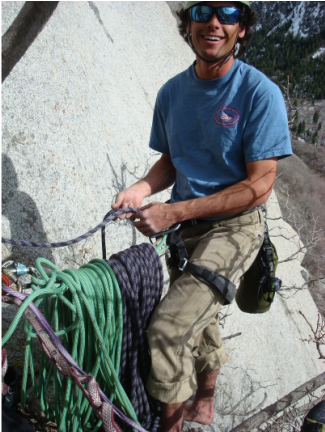
Flaking It Out
Just as you flake your rope at the bottom of a route, it is often the best way to manage your rope in the middle of a climb. You will need a big ledge. As you take in rope with the belay, simply pile it onto the ground at your feet in the order it arrives to you. Try to pile it on clean rock, rather than in the dirt, to avoid getting dirt in your rope, which will shorten its lifespan. This works particularly well if you are swinging pitches, since the rope will reverse its course without getting tangled. As your leader climbs upward, the rope will be ready.
If your stance is not completely flat, avoid flaking the rope. If it were to slide off the rock, you could end up with a serious snag and have to rappel to sort it out.
If your stance is not completely flat, avoid flaking the rope. If it were to slide off the rock, you could end up with a serious snag and have to rappel to sort it out.
 Our buddy Adam at the first belay stance of a three pitch climb with a beautiful rope basket. Nice and tidy. |
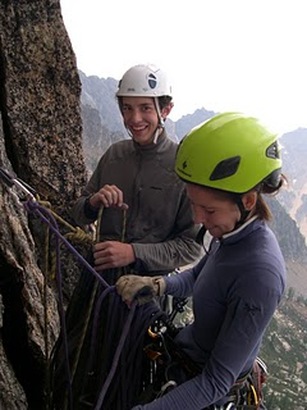
The Rope Basket
This system works well on stances where you are standing comfortably on a ledge, but you don't have enough space to flake the rope. It is also much easier if you are swinging leads. Your personal anchor system or tie-in is connected to your anchor, making a straight line to the rock. As your second climbs upward, you will drape the rope over your tie-in in neat, equal length coils. The coils shouldn't touch the ground; we have found that they tend to get tangled and twisted if they do. Your coils should start at your harness and move one by one toward your anchor. If you run out of space, place the next coil at your harness and repeat. This will keep them neat and less likely to tangle. The more care you take in making the coils neat, the same length and in the correct order, the less likely you are to have a tangle.
When your second reaches the belay, keep your stance as much as possible to keep your rope orderly. Once you have finished the transition, you can belay normally, giving rope from your rope basket as necessary. It also keeps the rope close at hand, so if there are tangles you can fix them easily. |
Looping Tie-Offs
This system works well if you are on vertical or overhanging terrain at your belay, since the rope isn't resting on the rock, and won't get tangled or dirty. You can also move around as much as necessary without disturbing the rope. As you take in rope, you will tie knots every 15 to 20 feet and clip them into carabiners attached to the anchor or your harness. This will keep the rope in short, manageable loops, in reach, and out of the way. To avoid tangles, make each loop sucessively shorter, so they can be easily distinguished. You can use Overhands on a Bight, Figure Eights on a Bight, or simply make a bight, twist it and pull a strand of the rope through the loop. This last knot is quick to tie with one hand, quick to untie, and works well in this application. If you are near bushes or rope-eating cracks, tie your loops shorter to avoid snags. This works particularly well if you are not swinging leads, since the coils are independent of the belayer if they are attached to the anchor.
