Crack Climbing Techniques
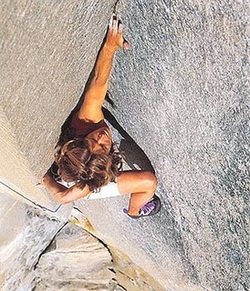 Lynn Hill, The Nose, Changing Corners 5.14a/b, Yoseite
Many climbers come to love the rhythm and flow of climbing crack, becoming addicted to the gorgeous splitter lines like Supercrack of the Desert in Indian Creek, UT (photo, below). In addition to being fun and aesthetic, crack climbing is also imperative to traditional climbing as most trad routes follow crack systems for gear placements.
There are six basic premises to crack climbing:
|
At a Glance:
Basic Premises:
Want more? Check these links out:
|
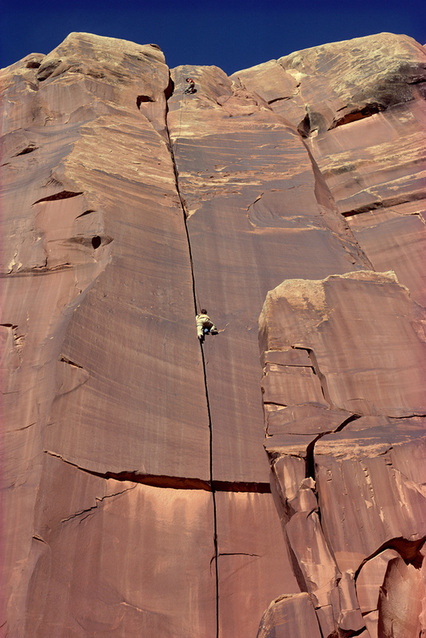
Ed Webster on the first ascent of the Super Crack of the Desert, 1976, Indain Creek, UT
Hand Cracks

When learning, find a nice hand crack in the
gym or at your local crag that you can top rope. Hand cracks are perfect for getting the movement and rhythm of crack climbing dialed. You want a crack that
your hand will fit into snugly when placed sideways (thumb down, pinky
up). When you flex your hand and/or pop out your bottom knuckles, the
meaty part of your hand around your thumb should make excellent contact
with the rock wall. As you put your weight on your hand, it should hold
steadily in the rock. If the crack widens a bit, you can pop out your bottom knuckles, forming a cup with your hand. This should also feel nice and solid in the crack.
The nice thing about hand cracks is that they also provide excellent footjams. In the same crack, jam one of your feet in sideways (pinky down, big toe up). You can stand on that footjam by rotating your knee upwards toward the center of your body and using your handjam for balance and slight upward pull. Step up with your next foot by placing it in the crack at about calf or knee height and repeating the motion. Use your hand jams for some upward momentum, but mainly for stability and balance. If you get the first moves no problem, simply repeat it over and over again by alternating right and left footjams and handjams.
"Once you get the hang of handjams, they are the most solid, least strenuous hand hold imaginable, and they come along with giant, solid footjams, what could be better! I feel that I am just hanging on my bones even when I am in a steep handcrack, and it requires very little muscle strength."
- Steph Davis
Below in the videos Jay Smith gives a pretty thorough lesson on hand and foot jamming in a hands crack (Part 1) and a good demonstration (Part 2).
Fist Cracks
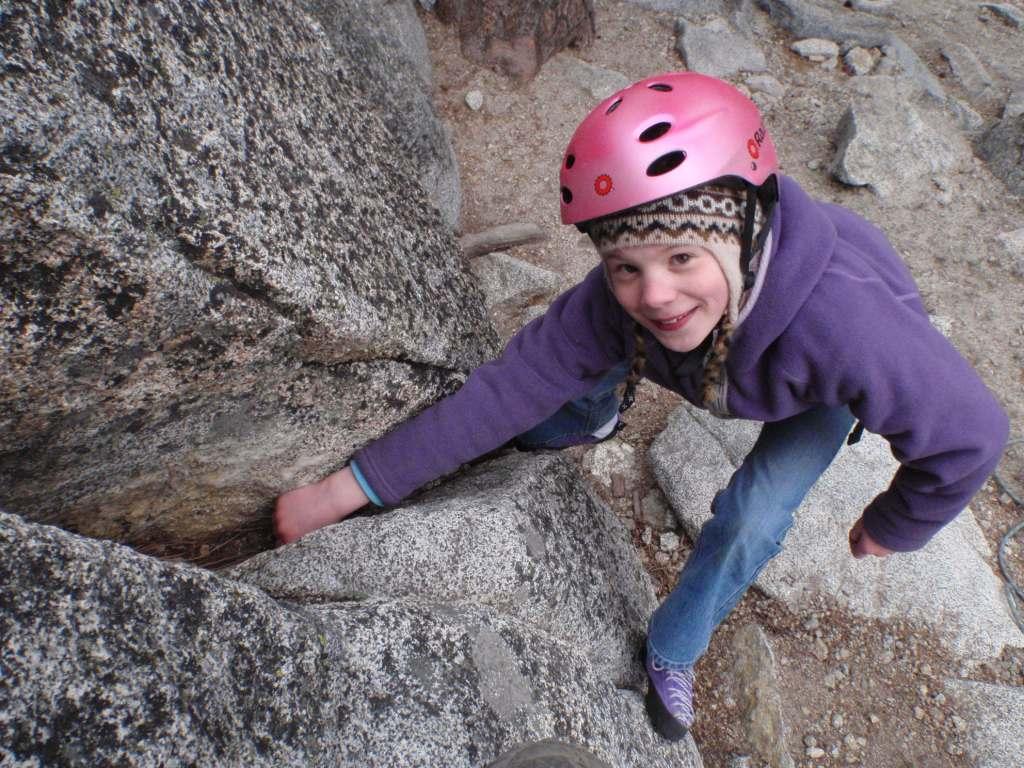
This young girl has great fist crack technique!
Too big for even a cupped hand jam? Now you're in fist crack territory. Fist cracks feel almost as solid as hand cracks, and continue to provide bomber footjams. To make a fist jam, simply slide your hand into the crack, make a fist, and flex outward. To make your fist jam wider, pop your thumb knuckle out. To make it more narrow, rotate it 90 degrees so that your thumb is on top and the back of your hand is making contact with the wall.
Your footwork will be similar to that used in a hand crack: slot your foot in the crack (big toe up) and cam it into a solid position by rotating your knee upward toward the center of your body. In a fist crack, you may need to be a bit more conscious of your foot placements, being careful to jam the thickest part of your foot to prevent slipping and sliding down the crack.
Your footwork will be similar to that used in a hand crack: slot your foot in the crack (big toe up) and cam it into a solid position by rotating your knee upward toward the center of your body. In a fist crack, you may need to be a bit more conscious of your foot placements, being careful to jam the thickest part of your foot to prevent slipping and sliding down the crack.
Thin Hands
Thin Hand Cracks will start to get a bit more strenuous and require more precise techniques. You will be able to fit your fingers into the crack, but not your whole hand. You'll be jamming your knuckles and fingers for placements, and less of your feet will fit in the crack than with hand and fist cracks. The main thing is to do what works for you. Every climber has different sized hands and feet and body lengths, so if another climber's beta is not working for you, ignore it and figure out your own. Experiment with different hand placements to see what works in the particular crack you are climbing. Try crossing or overlapping your middle and index finger within the crack in order to expand those lower knuckles. You can also pop out your thumb to expand your jam. For your feet, less of your shoe will fit in the crack, but shove what you can in there and crank on it to cam it in.
As your thin hands get even thinner, you'll be able to get more of a foot jam if you place your pinky side of your shoe in first. Your hand jams will also feel more secure if you jam thumbs down and get all of your fingers in line on top of each other, torque down on those fingers and pull your elbow down toward your torso.
In the video below, Sara Watson climbs this thin hands crack like a pro. Watch until the end to see some excellent whippers and very te
Finger Cracks
Good finger locks will feel quite secure as your knuckles will cam nicely into the crack. Use the same premises as with hand cracks by sliding your hand in as far as it will go and cam on your fingers by pulling your elbow down in toward your torso. Feet are much trickier at this size crack. Look for jibs outside of the crack or utilize a dihedral or protrusions for backstepping or stemming. If you have no features for your feet, try jamming your toe. If that doesn't work, your last hope is pressuring into the edge of the crack and using the oppositional force to step up.
For "rattly" fingers (too wide for a good finger lock), you'll want to wedge your fingers in as far as they will go and ratchet down on top of them until you get a decent jam. Steph Davis (crack climber extraordinaire) says this is the toughest size crack for her, so don't get discouraged. Look for constrictions in the crack to make the most of your jams, and really focus on the feet since your fingers are less secure. Look for jibs and protrusions that will really make those footjams count.
Watch the video below to see some nice finger cracking. Notice how the climber uses both the crack and outside features for foot holds. Also notice how he locks down on those fingers by rotating his elbow down and in toward his chest.
