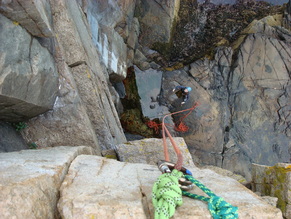
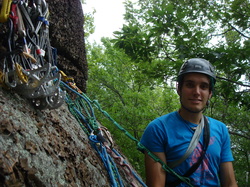
Standard Anchor Principles:

1. Use only SOLID ANCHORS. Everything depends on this. For example: you equalized your anchor (*golf clap*), but if one of your points is a dead twig-of-a-tree, then equalization won't help your anchor at all because as soon as any weight is applied to the anchor, the dead twig is snapping no matter what. Needless to say, sturdy points of connection are a prerequisite for a safe anchor. If you think one of your points is suspect for any reason at all (a rusty or spinning bolt, the tree looks diseased or dead, etc), DO NOT TRUST IT! Find someway to back the anchor up again. You are not gym climbing here; you must use critical thinking and get creative. Bolts are exposed to sun, wind, rain, snow, ice, irresponsible climbers, etc; and no one is going around and checking them all! Some bolts go unused for years. Carry extra webbing with you so that if the bolts at the top of the climb are suspect you can set an anchor off a boulder or tree that you may find on top. Read our section on using natural protection so that your options on anchor building are much wider. You should also learn how to use active and passive protection and carry some pieces with you, so that you can back up suspicious bolts with some of your own protection.
2. The anchor should be REDUNDANT (backed up) and have at least two points of connection (when using bolts) so that if any of your points fail, the load will be caught on the remaining point (note: if you are setting a traditional (gear) anchor, you should have at least three points of connection). You don't go driving through the Mojave without a spare tire, so don't accept an anchor that isn't properly redundant. There are a few deadly and easy-to-make mistakes that will undermine the redundancy of your anchor. Watch our quick video to see some of the deadly mistakes you could make and to see commonly used, easy proper techniques (including the Sliding X, Figure Eight on a Bight, and Overhand on a Bight.)
3. The anchor should be EQUALIZED so that at any given time the load is equally shared between all points in the anchor. If any one piece is over stressed, it could pull and then your climber will be resting on one point. If all your points are equalized, then they are much more likely to hold a fall or your weight as you lower.
4. Your anchor should have little to NO EXTENSION. If your anchor is properly redundant, then you probably connected the points of the anchor together using some webbing or cord (see video). Now, picture one of your points failing and popping out. What happens? There is all of a sudden extra slack in the system and as the force falls onto the other point(s) of your anchor, it also extends the length of the slack. As your anchor extends with the slack, the climber whose fall caused the anchor to pop, is now falling extra distance. The idea is to minimize this distance and therefore minimize the risk of serious injury. That extra distance might have sent your climber down on a jagged ledge or all the way down to the deck. The extension also generated more force that is now being generated on your already strained anchor. So how do you minimize extension? If you connect your points together using a Figure 8 or Overhand on a Bight, then you will reduce the extension generated by the Sliding X method. The Figure 8 on a Bight is preferable because it is much easier to untie after it takes a load. The Overhand on a Bight, however, will use less of your cordelette, therefore allowing you to connect your points lower down, thus reducing the angle size. In every case, you should weigh the pros and cons of each and determine which is best.
5. Look for SMALL ANGLES in your anchor. You will combine the points of your anchor with webbing, a runner, or cordelette. The smaller your angle is, the less force is being distributed onto your points. Wide angles produce a huge amount of force. Ideally, you want a 20 degree angle; 60 degrees is the absolute highest angle accepted. A general rule of thumb is to make a "V" with your index and middle fingers, spread it as wide as you can. That is the largest angle you would ever want to use in an anchor.
* If you climb multi-pitch routes, you should familiarize yourself with multi-directional anchors. Read our article on Multi-pitch Anchors.
There is a horrible mnemonic device for remembering these principles. As far as mnemonic devices go, it sucks, but it might help you remember, so here it is:
SARENE-SA!
Solid Anchors
Redundant
Equalized
No Extension
Small Angles
The worst acronym that might just save your life.
Allright, so we covered the basic principles of anchors, but how do you actually do it?
At the top of most Top Rope routes, you will find either pre-set bolts or some good trees or boulders to anchor to. Usually, your climbing guide book will give you some idea of what to expect. Again, always check the integrity of the bolts, the health and root systems of trees, and the quality of rock before setting the anchor. Do not use or trust anything that is suspect. Read our section on using natural protection so that you can make the best use of the resources available at the crag. A sturdy, healthy tree or giant, solid boulder is totally bomber if you check it properly and attach to it properly. Natural protection is also pretty simple to use. A girth hitch is the most common way to attach to a tree or large rock.

